Recipes

Recipe – Gluten and dairy free, berry nice chocolate chip granola!

It’s National Chocolate Week! So it would be wrong if I didn’t post a recipe that had something chocolatey in it right? Right. However, as I am still low sugar, I wanted to make something that tasted naughty but actually isn’t too sugary. So I have come up with this granola recipe to tickle your taste buds in the mornings. Of course it is gluten and dairy free, and also suitable for vegans 🙂

When I think of chocolate these days, I obviously think of dark chocolate, and when I was thinking of what goes well with dark chocolate I thought ‘What goes better with dark chocolate than cherries?’ and the answer of course was not much! Maybe orange, but it’s too close to call!

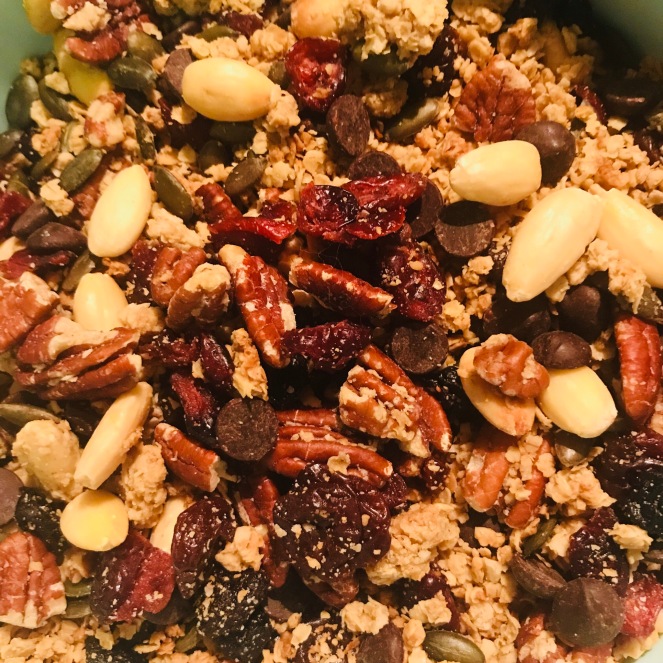
Then I instantly thought of almonds and suddenly I had the idea of cherry, almond and dark chocolate chip granola, but I couldn’t find enough cherries to my liking that wouldn’t cost me an arm and a leg so it turned into cherries, cranberries and blueberries. I also can’t bear to not put pecans in my granola, so chucked them in too, and some pumpkin seeds for a bit of colour.

What I was left with was a rather lovely little granola recipe that I am just dying to share with you all, so here goes!

Gluten and dairy free, berry nice chocolate chip granola

Ingredients – Makes 850g – 1kg

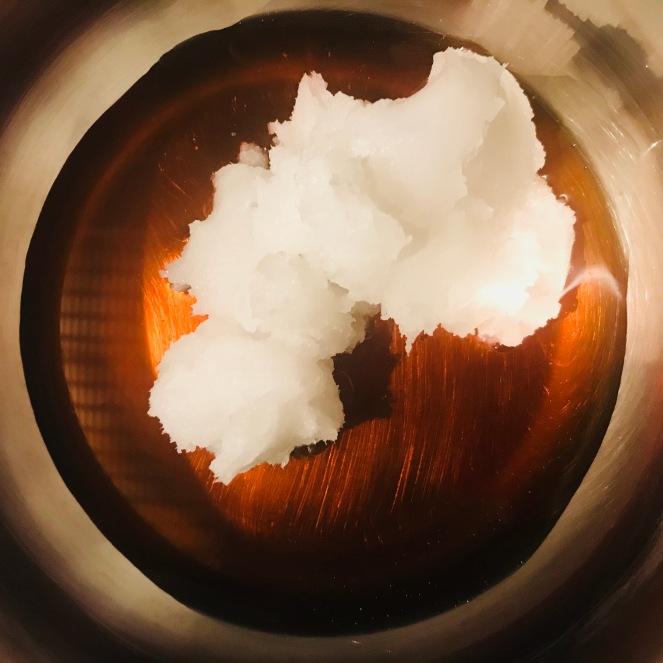
  • 100ml maple syrup (or you can use honey/agave syrup)
  • 4 tbsp coconut oil
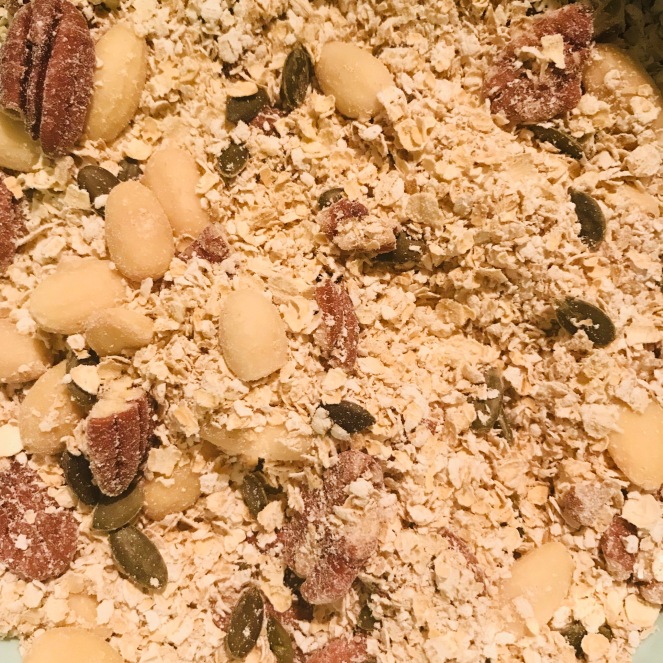
  • 250g gluten free oats
  • 100g pecans
  • 100g almonds
  • 50g pumpkin seeds
  • 200g mixed berries, I went with cherries, cranberries and blueberries
  • 100g dark chocolate chips (dairy free of course!) – you could replace with a few cacao nibs if you like!
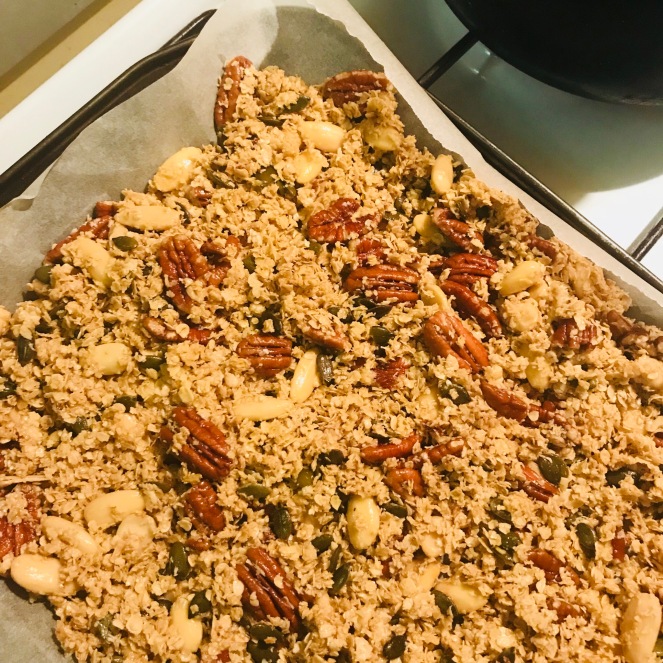
Method

img_3246
Preheat the oven the to gas mark 4 (180 degrees). Pop the maple syrup and coconut oil into a small saucepan and heat over a gentle heat until oil has melted and the oil and syrup are combined.
img_3254
Meanwhile mix the oats, nuts and seeds together in a large mixing bowl. I choose to leave my nuts whole, and I like it this way, plus chopping them also hurts my hands because of my fibromyalgia, but if you like your chopped then go ahead! Pour the melted oil and maple syrup over the mixture and give it a good stir until all the mix is well coated with the oil and syrup.
img_3257
Line a baking sheet with some baking parchment and spread the granola mixture onto the tray. Bake in the preheated oven for 25 minutes, removing to turn the mixture over every five minutes or so, this way the bottom won’t burn!
img_3267
Leave to cool completely on the tray. When you first take the granola out of the oven it will still be soft, but as it cools it goes all nice and crunchy. Once completely cool, place into a large mixing bowl and mix in your berries and chocolate chips so that all of the ingredients are evenly distributed. Store in an airtight container and enjoy!

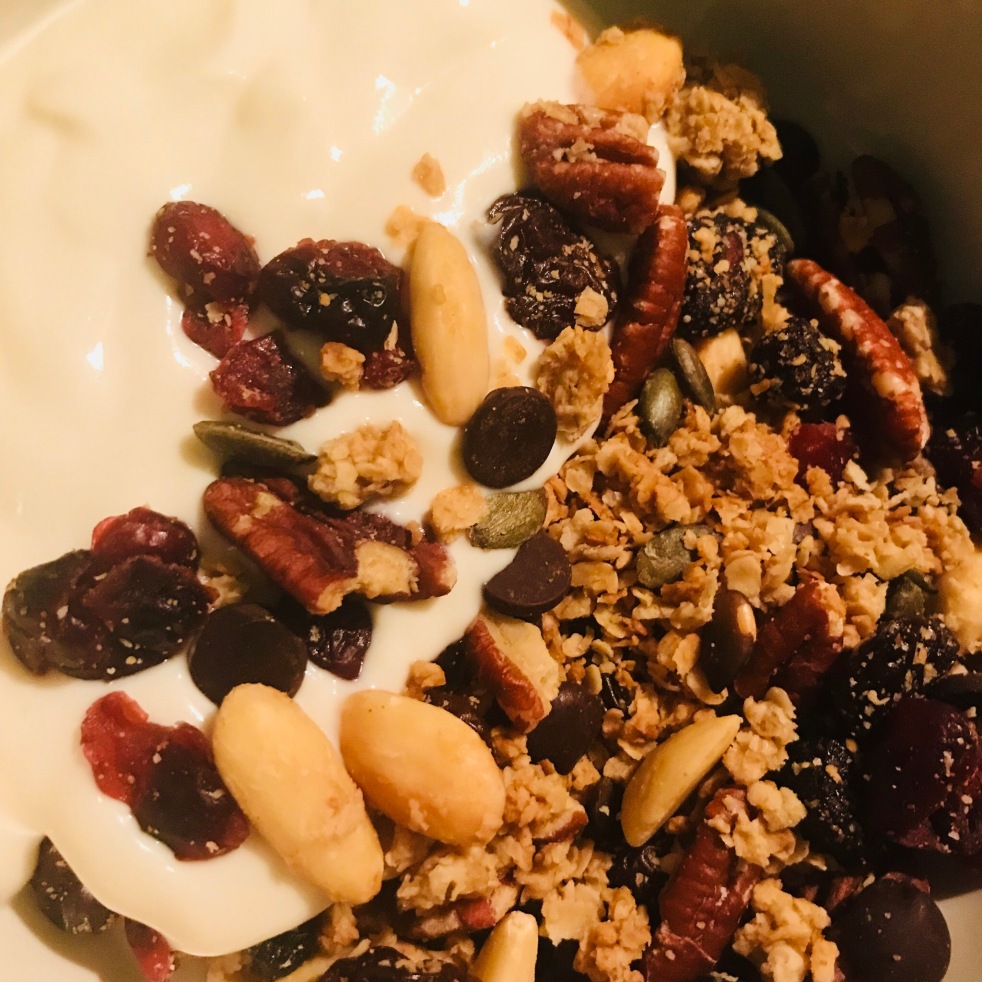
Enjoy! I personally love to eat my granola with some thick coconut yoghurt, and if I’m feeling really fancy I might chuck some fruit compote on too, but you could also enjoy with some nice cold non dairy milk. Or maybe even sprinkle over some porridge (imagine the dark chocolate going all melty, yum!)

img_3271

I hope you have enjoyed this recipe, do leave your comments down below should you so wish 🙂 or pop over and say hello on social media. You can find me on Facebook, Twitter, Pinterest and Instagram. also don’t forget to check out my other recipes here!

Toodle Pip!

Recipes

Recipe – Gluten and Dairy Free Yorkshire Pudding

The quest for a yorkshire pudding I can eat is over! I have finally perfected my gluten and dairy free yorkie, and isn’t it a thing of beauty??!

It took my some time to get this right but now that I have I am delighted to share it with you all!

Gluten and Dairy Free Yorkshire Puddings

Ingredients – makes 10 muffin sized yorkies

  • 120g gluten free plain flour
  • 2 eggs
  • 175mls rice milk
  • Olive oil to cook

Method

  1. Place the eggs and flour into a bowl and whisk together until well combined
  2. Slowly add the milk to the flour and egg mix, whisking together until well combined, ensuring there are no lumps, between each addition
  3. Add a pinch of salt and leave to rest for at least an hour
  4. Place about half a teaspoon of olive oil into each hole of a muffin tin, and place into a hot oven of at least Gas Mark 6/ 200 degrees until hot but not smoking (about 5 minutes)
  5. When the oil is good and hot take the tin out of the oven, and pour the batter evenly into the holes of the muffin tin before the oil cools down. Replace into the oven and try not to opewn the door while they are cooking.
  6. Cook for 20 minutes. or until golden and crispy.

Enjoy with your favourite roast dinner and gluten free gravy!

Hope you enjoy this recipe as much as I do and it helps those who have missed yorkies as a result of a gluten or dairy free diet to become reunited with this neseccary part of any British sunday roast!

As ever, feel free to coment in the section below, or come and say hello over on Facebook, Twitter and Instagram!


Recipes

Recipe – Green Beans with tomato sauce and brown rice

I’m often looking for something quick, easy, and cheap to cook. Even better if it is something that reheats well so I can take leftovers to work the next day. I’ve also been trying to eat much less meat recently (don’t worry, I won’t cut everything out and stop eating!), and I obviously like my dinners to be healthy. Finally they have to be gluten and dairy free.

We also like to eat seasonably. Green beans are in season right now and my husband keeps bringing them home so I needed to find a recipe that would jazz them up a little. However lovely green beans are just steamed or quickly boiled, its always nice to try something new.

All of the ingredients in this recipe are things that most families will have in the cupboard or the fridge. Theres nothing fancy in this, but the ingredients all work well together and create a simple yet tasty midweek supper. It is also very easy to double or even triple up for batch cooking.

Green beans with tomato sauce and brown rice

Ingredients – serves 2

  • 1 tbsp olive oil
  • 1 red onion – finely chopped
  • 125g green beans – roughly chopped
  • 2 garlic cloves – crushed or finely chopped
  • 1/2 tsp ground all spice
  • 250g passata
  • Lemon – cut into wedges
  • 150g brown rice

Method

Heat the olive oil over a low-medium heat in a large saucepan and add the onion. Gently fry for 10 minutes or until softened and translucent.


Add the beans, garlic and all spice. Stir gently until all of the ingredients are coated in the all spice.


Add the passata and about 50mls water. Bring to the boil and then cover and simmer for 30 minutes. stirring occasionally.


Meanwhile cook the rice as per pack instructions.

When the rice is cooked, drain and divide between two dishes. Spoon the beans and tomato sauce into the dishes and garnish with a lemon wedge to squeeze over to taste.


Easy peasy! So simple, so cheap, and so tasty. I made a double batch this evening and will be taking leftovers to work tomorrow which is always a bonus for the tummy and the purse! Saucy dishes always make the best leftovers.

For more gluten free, dairy free and anti inflammatory food inspiration please follow me on Instagram. For all things fibromyalgia, then stay up to date over on my Facebook and Twitter pages!

Toodle pip!

Recipes

Recipe – Pan fried mackerel with green beans, beetroot and a fried egg

Nothing quite screams summer like fresh fish, and vegetables from the allotment, such as green beans and beetroot. This year has been quite a fruitful year on the allotment (if you excuse the pun), and it is at this time of the year that we try our best to incorporate what we grow into quick and easy meals.

Mackerel is cheap, quick and easy to cook, and tastes delicious, not to mention it is incredibly good for you as part of an anti inflammatory diet, and I try to eat at least 3 portions of oily fish a week. I personally love the saltiness of smoked mackerel, but un smoked will do just as nicely. As would trout or salmon. We used the green beans not to specifically pair with the fish but just because this is what we had harvested just the day before, along with a shed load of beetroot. The egg? Well, who doesn’t love a fried egg?

This is possibly one of the tastiest yet easiest meals you can plate up this summer, and if you are like me thats perfect, as I hate cooking over a hot stove for too long in the heat!


Pan fried mackerel with green beans, beetroot and a fried egg

Ingredients – Serves 2

  • 1 teaspoon of olive oil
  • 2 fillets of mackerel or other oily fish
  • A good fistful of green beans, sliced to you preference
  • Half a large beetroot, grated or sliced thinly
  • 2 eggs
  • Salt and pepper

You will also need a large frying pan and a saucepan/steamer

Method

  1. Bring a large saucepan of water to the boil and add the green beans and cook for 8-10 minutes until just soft, but still with a bit of a bite, and still bright green, or steam to the same effect
  2. Meanwhile, heat the olive oil in the large frying pan over a medium heat, add the mackerel, skin side down and cook for 3-4 minutes, until the skin is golden and crispy. Then flip over and cook for a further 3-4 minutes until cooked through.
  3. When the beans are cooked drain and pop onto your plate, sprinkling over the grated/sliced beetroot and a good pinch of salt and pepper to your taste. Place the cooked mackerel on top.
  4. Place the frying pan back on the heat and add more oil if needed to fry your eggs. Fry to taste and pop on the top of the mackerel.
  5. Voila! Bon Appetit!


For more gluten and dairy free, and anti inflammatory food ideas, don’t forget to follow me on Instagram, Twitter, or Facebook, or even all three!

Toodle Pip!

Recipes

Review – Gluten Free and Vegan, Troo Granola

I love granola. I love baking it, eating it, the aroma it spread around the house, and sharing it, but sometimes it can be time consuming to make. So when Troo Granola offered to send me a pack of their granola toasting kits I simply couldn’t say no! I would like to add at this point that Troo Granola have not asked me nor paid me to do this review… I simply wanted to do it for a great business, and for people I admire. Their products speak to me as somebody who is treating their illness with an anti inflammatory diet and fit in with my diet extremely well.

IMG_1935

Troo Granola is no ordinary granola. It is 100% certified gluten free, refined sugar free, 100% natural, vegan friendly and handmade. What I also love is that they are a great British company, and they really do love what they do. They simply want to make breakfast great.

IMG_1937

Troo Granola toasting kits take the hard work out of making your own granola. You get that satisfaction of producing something yourself, but it doesn’t actually take that much effort, and the end result is delicious.

To toast your own Troo Granola, all you need is a toasting kit, a baking tray, an oven and your choice of oil and sweetener. The instructions on the packet are easy to follow, and because you mix everything in the bag there is also minimal mess and washing up! Hurrah!

I chose coconut oil and maple syrup for my oil and sweeter and the handy measuring pot makes this step simple. 40ml of oil and 60ml sweetener. Pour it in the bag, give it a good mix, and then tip it out onto your baking tray. Bung it into a pre heated oven for 15 minutes, give it a stir half way through, and then dig in! It really is that simple.

IMG_1951.JPG

One word of warning. You may not be able to stop eating it. Do not expect it to last long!

img_1957

For the full Troo Granola range and to learn more please visit their website here.

Recipes

Recipe – Gluten and Dairy Free Coconut Victoria Sponge

I love cake. I mean, I really love cake. But after going gluten and dairy free I lost my baking mojo. I had convinced myself that nothing would taste the same ever again and that I would only be disappointed. Boy I was wrong!

This Gluten and Dairy Free Coconut Victoria Sponge really helped me recover from my baking grief. It was easy to make, and represented everything I love in a cake. The sponge was light and rose well, it had lashings of buttercream, and it tasted oh so sweet.

Gluten and Dairy Free Coconut Victoria Sponge

So I just had to share it with you all on here. I hasten to add that although I have gone dairy free I have not gone egg free and opted to make this cake using eggs, but as this is a very wet mix already it can be easily veganised by using an egg replacer.

So here it is!

Gluten and Dairy Free Coconut Victoria Sponge

Ingredients – Serves 8 greedy cake lovers or 10 sensible people.

For the cake

  • 175g dairy free margarine – I used Pure Margarine
  • 175g golden caster sugar
  • 3 eggs (or the equivalent of egg replacer for a vegan cake)
  • 2 tbsp coconut cream
  • 1.5 tsp baking powder
  • 175g gluten free self raising flour
  • 1/4 tsp xanthan gum
  • 50g dessicated coconut

For the filling and topping

  • 300g icing sugar
  • 50g dairy free margarine from the fridge
  • 1.5 tbsp coconut cream
  • Raspberry jam

Method

  1. Pre heat the oven to gas 4/180 degrees/fan oven 160 degrees. Line the bases and grease the sides of 2 x 8inch sandwich tins.
  2. Cream the margarine and sugar together until light, pale and fluffy.
  3. Beat in the eggs one at a time, mixing well, and scraping down the sides of the bowl when mixing.
  4. Beat in the coconut cream.
  5. Add the baking powder, flour, xanthan gum and desiccated coconut to the bowl and fold in very gently with a large metal spoon, working hard to maintain as much air in the mixture as possible.
  6. Divide the mixture between the two tins and bake for 25 minutes until light and golden. Test that the cake is done by gentle pressing the centre of the cake, it should spring back up nicely. Leave to cool for a few minutes in the tins and then gently turn out onto a cooling rack.
  7. While the cakes are cooling make the buttercream by placing the icing sugar, cold margarine and coconut cream in a bowl and beating with a whisk until light and fluffy. You may find that you icing is a little runny at first, but place it into the fridge for 30 minutes and it will firm up enough to not fall off your cake! If you find that your icing is too stiff then simply add a little more coconut cream, and if too runny, a little more icing sugar.
  8. Make sure your cakes have COMPLETELY cooled. When you are sure they are cooled, spread one half of the icing over one cake, and raspberry jam to your liking on the other cake. Sandwich the cakes together and top the cake with the remaining buttercream. If you are feeling fancy you can sprinkle some extra desiccated coconut on top of your cake too….!

Hopefully your cake will look a little like this. I quite like the icing running out the. middle!

IMG_1607
The finished product, look at all that cream 🙂

I hope you enjoyed this recipe! Please do let me know what you would like to see me try to bake and recipe share in the comments section below, and also what you think of the cake if you make it!

Hope to see you on social media, come and give me a high five when you are on Facebook, Twitter or Instagram.

Toodle Pip!

Recipes

Recipe – Gluten and Dairy Free Classic Spaghetti Bolognese

As you may have guessed by now, I’m a simple home cooking kind of mother and wife. I enjoy cooking a good recipe that all of the family can enjoy, regardless of my gluten and dairy intolerances. The food I cook needs to have minimal prep time and either be cooked quickly or be able to be left to cook while I get on with other things. This is also important in getting the balance right between time doing active tasks and resting in order to manage my fibromyalgia. I’m not able to spend all my time in the kitchen cooking up marvellous culinary creations.

That being said, even if it is ready quickly or slow cooked my food does have to be tasty. A popular meal in our house is spaghetti bolognese and with a good quality gluten free pasta we can all enjoy this classic dish. The good thing with this recipe is that it can be easily doubled and made ahead of time to be reheated if you are cooking for a crowd. I personally like to cook a little too much so that we can have leftovers another day. As ever I recommend using whole and organic ingredients but if you can’t manage that at least get free range, organic beef.

Gluten and Dairy Free Spaghetti Bolognese

Classic Gluten and Dairy Free Spaghetti Bolognese

Ingredients – Serves 4 – 6

  • 500g good quality gluten free spaghetti
  • 1 medium onion, finely chopped
  • 2 medium carrots, finely grated
  • 3 tablespoons good quality olive oil
  • 500g free range organic minced beef
  • A generous knob of dairy free margarine
  • 3 garlic cloves, crushed or finely chopped
  • 600ml tomato passata
  • 2 bay leaves
  • 600ml vegetable or chicken stock
  • Sea salt and black pepper

Method

  1. Heat the olive oil in a large pan on a high heat, I use a stock pot as is plenty big enough. Add the minced beef, breaking up with a wooden spoon if needed. Leave to cook for a few minutes before turning, and don’t worry if a few bits get caught on the bottom of the pan, this all adds to the taste. Turn the beef over and repeat until good and brown all over (not just beige), most of the oil should have been reabsorbed by this point.
  2. Removed the beef from the pan using a slotted spoon and set aside. Melt the dairy free margarine in the same pan, scraping any bits of meat that have got stuck off the bottom, and turn the heat to low. Add the carrots and onion, cover with a lid and sweat for about 10 minutes until really softened and the onions are translucent.
  3. Add the garlic to the pan and cook, covered with the lid, for another couple of minutes.
  4. Add the passata and bay leaves and stir well until combined. Returned the meat to the pan and add the stock. Season well, stir again, and cover with the lid. Simmer on a low heat for at least an hour, preferably two hours if you have time, stirring occasionally. The bolognese will be ready when the sauce has thickened and is no longer ‘watery’. The pictures will give you a good idea of how it should look. When it has cooked give it a quick taste to check it is seasoned to your liking.
  5. When you think the sauce is pretty much ready you can cook your pasta as per pack instructions.
  6. Drain the pasta once cooked and divide amongst the plates. Pile the ragu sauce on top and garnish with some parsley if you are feeling fancy. For those who are not dairy intolerant grate some parmesan over the top.

Gluten and Dairy Free Spaghetti BologneseIMG_1404

Such an easy dish to make and I promise, the 1-2 hours of simmering really is worth it. It gives it a taste you will never get from a jar of pasta sauce. If you give this recipe a go please to let me know what you think in the comments section below.

Hope you all have a great evening and I’ll see you very soon, perhaps even on Instagram, Facebook, or Twitter.

Toodle Pip!


Recipes

Recipe – Dairy Free Avocado and Strawberry Milkshake

As you may have guessed by my food diary posts (see here for the latest post), I love breakfast. I also love avocado. But sometimes I fancy something lighter than porridge, or avocado on gluten free toast. So here we have another glugable smoothie/milkshake recipe. As with all of my recipes, it is suitable for a gluten free, dairy free, anti inflammatory diet which is perfect for is you suffer from Fibromyalgia.

Dairy Free Avocado and Strawberry Milkshake

Ingredients – Serves 1 to 2 depending on how hungry you are (I’m greedy!)

  • 1/2 ripe avocado
  • 150g strawberries
  • 4 tbsp plain dairy free yoghurt such as soya or coconut
  • 200ml dairy free milk such as almond or coconut
  • 1 tsp honey or to taste

You can guess the method I’m sure, plonk in the blender, whizz until smooth and enjoy!


As always, for inspiration of how you can use food to treat fibromyalgia follow my on Instagram, Facebook and Twitter. Also, I’d love to know what you would like to see more of on the blog! What do you enjoy, what do you find helpful and what would you like to see more?

Toodle Pip!


Recipes

Recipe – Comforting Gluten and Dairy Free Cottage Pie

I wouldn’t normally share a recipe like cottage pie so far into the spring, but getting caught in hailstones and the freezing cold yesterday made me crave something warm and comforting. There is nothing quite like a cottage pie to warm you through and make you feel satisfied.

Before I went gluten and dairy free, I used to make comforting food like this all of the time, but back then it would have been full of butter, cream and wheat etc. This lighter version will give you all of the comfort a non gluten and dairy free cottage pie does but without that bloated, uncomfortable, sleepy feeling. Being gluten and dairy free it is also anti inflammatory.

This recipe is also great because it is quick and simple, and the whole family will love it. It is a good dish to make when you are cooking for a crowd as the portions can easily be doubled and it can be made in advance, plonked in the fridge, and then finished off in the oven when you are ready to eat.

Gluten and dairy free cottage pie

Ingredients – Serves 4 hungry people

  • 1 large onion
  • 2 medium carrots
  • 750g potatoes
  • 1 tbsp olive oil
  • 500g lean, free range minced beef
  • handful of fresh thyme leaves removed from stem
  • 350ml vegetable stock
  • 1tbsp tomato puree
  • 1tsp cornflour mixed with tbsp of cold water
  • Dairy and gluten free margarine – we use Pure Free From
  • Sea salt and ground black pepper to taste

Method

  1. Pre heat the oven to gas mark 6/200 degrees
  2. Peel and finely chop the onion. Peel and dice the carrots into about 1cm cubes.
  3. Peel and chop the potatoes and place in a saucepan with cold water. Set aside for later.
  4. Heat the olive oil over a medium heat. Add the mince and break up with a wooden spoon into small pieces. Cook until well browned. Don’t worry if it catches a little on the bottom of the pan, it all adds to the taste!
  5. Before all the fat from the beef has been absorbed add the thyme, onion and carrot and cook on a low heat until softened, stirring occasionally. This will take about 5-8 minutes.
  6. When the vegetables have softened add the vegetable stock, tomato puree, and bring to a simmer. Add salt and pepper to taste. Slowly add the cornflour mixture and stir. Simmer gently until the sauce has thickened.
  7. While the sauce is thickening, boil the potatoes until soft. Drain in a colander and leave to steam dry for a few minutes. This will stop your mash going soggy. Mash the potatoes with the margarine, salt and pepper to taste (we use about 2 tablespoons of margarine).
  8. In an ovenproof dish around 20 x 28cm in size, place the beef, vegetables and sauce. Place the mash potato on top in whichever design you fancy. I find piping easiest, but won’t judge you if you just plonk it on and spread it over! It all tastes the same. If you are going to serve and eat the pie later, you can now put it in the fridge until you are ready to eat.
  9. Bake in the preheated oven for around 25 minutes (it may take 30 if baking from the fridge) or until piping hot and golden brown. Serve and enjoy!


Yummy yummy in my tummy! Let me know what you think of this recipe in the comments section below of over on social media by using the icons at the bottom of this post!


Recipes

Recipe – Rhubarb and orange breakfast smoothie

Sometimes you need an awakening of the senses in the morning and nothing does this better than a really punchy yet tasty smoothie. So today, we devised our own recipe for a rhubarb and orange smoothie based on one we found in the River Cottage Light and Easy cookbook, which has been a godsend since being gluten and dairy free, and a steal at only £6! We have more rhubarb growing in the allotment than I have ever seen, and if I eat all in a crumble, well, I dread to think what might happen to me!

Not only is this smoothie tasty, but like all good smoothies, it is pretty awesomely healthy too. Rhubarb stalks (DO NOT eat the leaves, they are terribly poisonous) are known to have powerful anti inflammatory benefits, as well as being packed with properties that can benefit digestion, and protect kidney function. It is also documented that Rhubarb promotes anti cancer activity.

There are many arguments as to whether citrus fruits are anti inflammatory, or whether they make inflammation worse. Some say that citrus fruits contain properties that are powerfully anti inflammatory, while others argue that in some people they can contribute to the development of chronic inflammatory diseases. Personally I don’t seem to suffer any ill effect from citrus fruits, when consumed in moderation. I love the taste of a juicy orange that are renowned for a wealth of health benefits and their high concentration of vitamin C which, as someone who seems to pick up viruses particularly easily, I need. Amongst other health benefits oranges are also great for relieving constipation (a big problem for some people with Fibromyalgia), eye health, the skin, blood pressure, cholesterol and heart health.

Rhubarb and Orange breakfast smoothie

Ingredients – serves 1

  • 200g stewed rhubarb
  • 150ml orange juice
  • 2 tsp honey
  • Small piece fresh ginger, to taste (I used a piece the size of the end of my little finger)

As with my previous smoothie recipe last week, no real method needed, just stick it all in the blender and whizz away until smooth and enjoy!

Apologies for the bad photo, I couldn’t wait for natural light to flood the flat before I gluttonously devoured the smoothie.


Let me know what you think in the comments below! You can also follow me and keep up to date with my journey on Facebook, Twitter and Instagram, by using the links to the right of this post.

Toodle pip!